

Showing posts with label Thrifting. Show all posts
Showing posts with label Thrifting. Show all posts
Wednesday, February 25, 2015
DIY baby shower on a dime!


DIY easy yarn tassel for decorating

This past weekend I hosted a baby shower for my friend. Being the thrifty chick I am, I tried to make as many decorations from scratch as possible, saving me money and giving my party a unique and original look.
Tuesday, August 19, 2014
Headboard before and after and a bedroom update
The moral of this story is going to be this- I am a procrastinator. 3 years ago my husband and I had a fight. Ok well, we have had a few fights since then, but that is beside the point. It was early December, finals were coming up, stresses were high and we had a fight. My husband is a dear, and he fights better than I do. What I mean by that is, I use my words as a weapon and say things I don't mean when I am mad. Or maybe some of the things I do mean, but they come out sounding like I am throwing a hatchet when really, if I took a moment to calm down and wait until I could say them a little nicer (or quieter) they wouldn't sound so bad. As for Shaun, he fights fair. He is a calm fighter, and when I really push him to his limits, he takes a moment to calm down and let things cool off instead of acting like... well, me. I love him for that and I am hoping to be better.
Anyway, that day in December when we were mad, he left for a little while. While he could have been off doing something for himself, studying, shopping for man toys, hunting or whatever the heck guys do when they are mad at their wives, he did something completely the opposite. He went to home depot, bought the materials and constructed a beautiful headboard. He was gone for quite a while, and by the time he came back you can bet I had calmed down, felt bad and was ready to mend things.
For Christmas that December, he surprised me with this beautiful headboard. He spent a lot of time making it perfect, filling all the imperfections with putty and making it as smooth as he could because he knew I would want to paint it.
To say I felt guilty is a big understatement. He knew I had wanted a headboard for a long time, and instead of buying one that we couldn't afford, he built one that we could. It is simple, beautiful and meaningful to me. He started it and I finished it. I love painting furniture and truth be told, this is the first "new" piece I have ever finished. I am really happy with how it turned out, it is so special.
----------------------------------
My very favorite paint to use when I give furniture a new face is, BEHR paint and primer in one. No one is paying me or persuading me to say it. I love it and I continue to use it over and over again. I love the coverage and how it holds up over time. Since I like to decorate in sort of a vintage farmhouse style, I always use the color "Ivory Palace" in satin. It is the perfect combo of cream and white and if you decided to antique your piece with stain, the ivory palace takes it very well, leaving a pretty cream color underneath.
Pre paint:
.jpg)
Layer 1:
.jpg)
Layer 2 and 3. After 3 layers it looked great. I let it dry and my husband was actually able to secure it to our bed just a few hours later. He built it 3 years ago and I was able to paint it in a few hours and have it on my bed. What the heck took so long!? I guess since it is so special to me, and I am used to fixing up old furniture with lots of imperfections, I have been a little nervous.
I love how it turned out.
.jpg)


Wednesday, May 28, 2014
Bedroom Decorating tricks {on a dime!}

Honestly, these hydrangeas were the most expensive decor item in the room. I have collected these for months when they go on sale at Joanne's Fabric. I love how they all look together in the basket. The handkerchief was a gift to me from a family member. I love its hand stitched tatting and intricate detail. I knew I would display it instead of using it for its true purpose... boogies! haha

The lamp was a DI find, one small chip on the back of it that no one will ever see. I was so excited to find it for $2. The shade is from a Shopko clearance rack.
I use a pretty white dish I thrifted to display my jewelry and keep it in an easily accessible place. I let the pearls drape over the bowl to add a little bit of glam. Beneath it is a pretty doily I picked up at a garage sale.

This lovely dresser is a garage sale find. A woman was selling all of her Grandmother's furniture. I would have bought the whole lot if I had the money... it was all so beautiful. She had trunks and chairs and this beautiful vanity with a mirror that was so pretty. I left with this dresser, talking her down to only $35 because she needed to sell all her items. I was ecstatic. I painted it a creamy white, and left the top alone. I like the contrast and the distressed look it has. I love the original hardware and dovetail drawers.
The hassock is also a garage sale find. Underneath the cute polka dot fabric that I covered it with is a funky yellow vinyl. While I thought it looked pretty cool as was, I knew it wouldn't match my room so I took this pretty fabric and hot glued it around the bottom... cause who is going to tell a difference between that and a sewed cover? :)

This book page wreath adds texture and art to my room. I love it nestled right at the top of my old barn wood ladder. Do you want to make your own? They are so cheap and easy... find the TUTORIAL here.

I also use the ladder to display an old crocheted quilt if found over at Vintage Farm Furniture. I love it's beautiful scalloped edges. This adds a coziness to the room and also a fun texture.


This old gal was a hot deal I scored at a moving sale. It was $40 and lime green. Yep, the ugliest green you can imagine. I'm sure it looked cute in a child's room or something, but it wasn't going to last in my home that color. I saw its shape, hardware and legs and had to take it. I saw its potential. I started out painting it a creamy white (Ivory Palace from BEHR paint + primer) and painted the bottom. I wanted to sand down the top and stain it a walnut to match my other dresser in the room. As I started to sand it, the original owner's white primer showed through as the green faded away. I stopped and stepped back, admiring the distressed and uneven look of the sanded top. I couldn't do any more, I had never seen a unique look like this and I fell in love with it. Maybe it doesn't suit all tastes but I wouldn't change it now.
I ended up using a little stain to antique the drawers on the front. For now, it looks just how I like it.
A family member found me the old well bucket at an antique flea market sale. It's an old original bucket and a real treasure to me. You could use it for so many things, for now, its purpose is to hold all of my magazines that I have yet made time to drool over :)

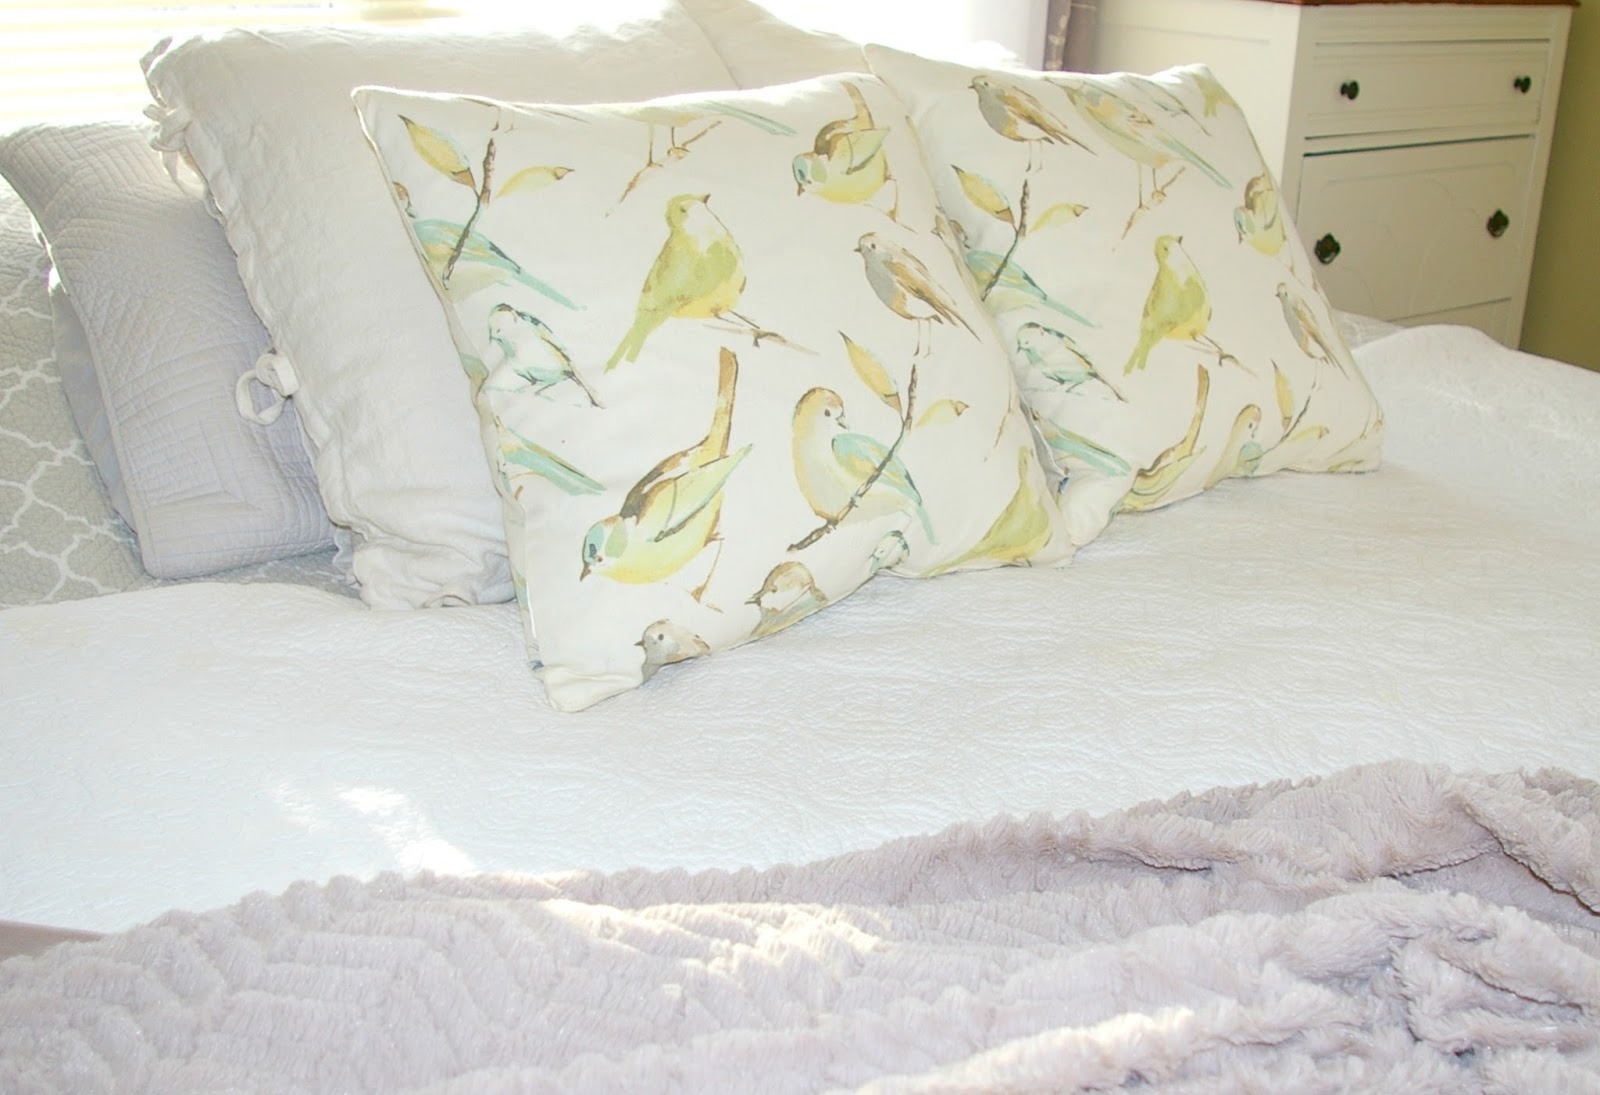
These pillows are from TJ MAXX I just love the birds. The fun thing about decorating in neutrals is that you can always swap out accessories (pillows blankets flowers curtains or lamps) for different colors each season or Holiday.
If you tend to change things around a lot (LIKE ME!) then stick to neutrals and change the pillows. You will be surprised at how much throw pillows and quilts can change the look of a room.
Bedding, TJ MAXX (all separate pieces found over time), all curtains found at ROSS stores.


Friday, May 23, 2014
DIY herb garden in an old wine barrel


... and after the sanding...


 |
| Rosemary compound butter |
.jpg) |
| Rosemary and olive oil roasted vegetables |
Saturday, November 9, 2013
How to plan an inexpensive party that still looks adorable!

I thought tonight I would share how I planned and executed a really cute and inexpensive party for my 4 year old little boy. This party doesn't have to just be for kids though, it would be super fun to do as a one on one or group date, for a family reunion or friend party!
I have struggled for ideas for fun birthday parties since there are less options for things to do in the winter weather. I was first inspired by this idea of doing an "at home drive in movie" on Pinterest, but with a little creativity, my husband and I were able to switch things up a little from the original posts I had seen. He suggested that it would be fun to have the kids color their own car instead of us doing all the work before hand. GENIUS!
Here are a few steps of how I put together the party, on a dime. I was able to borrow a few things, and use a lot of what I already had at home to make the decorations. Forcing yourself to get a little creative with things you already have can really stretch a buck. Plus we can even say we are going green by reusing what we have one more time... ok maybe it's a stretch but it's a start!
Here's a step by step guide to a party on a dime. Hope you enjoy!
THE INVITATION(as seen above)
I designed for free on picmonkey.com and then the prints were ordered through Costco for only 13 cents/invite.
THE CARS
The cars are made from cardboard boxes purchased from Home Depot for $1.30/box. We painted them with 1 layer of cheap white paint we had in our basement. I bought black paper plates from the dollar store (24 plates per package) and with 2 packages I had enough for 10 cars and some leftover. Total cost, $2. Next, I hot glued them on for tires. I chose to use Vinyl lettering to add the children's names to the top of the car. I printed it myself so it was inexpensive, but to save on cost you could just paint or write the name in marker, and color two yellow head lights on.


THE TABLE SETTING
For the simple table setting, I used plates and cake holders to stack and add height to my table and to make it a bit more visually pleasing.
The balloons were about 99 cents a piece, and using gold blue and red added a more "circus-y, vintage-y" kind of feel. I had a tablecloth that I purchased from a spool of clearance fabric at Joanne's a few years ago. It's neutral brown color matches just about anything I do. If you have never looked at Joanne's section of tablecloth fabric, check it out!
The popcorn machine was a total hit, and it was no added cost because I borrowed it from a family member. A similar one can be found HERE at Shopko.com
I made the banner last summer for my 4th of July using scrapbook paper and gluing it onto twine. It happened to match so I thought it would add some extra color and help add height to my table décor.

I made the banner last summer for my 4th of July using scrapbook paper and gluing it onto twine. It happened to match so I thought it would add some extra color and help add height to my table décor.


Did you know that instead of buying labels you can just make your own cute ones in Microsoft word? UM YES PLEASE!
Its so easy Ill be making a post to share this secret very soon.
I made my own label, printed it and glued it to some old scrapbook paper I had in storage.


For the popcorn cups I did the same thing, and then just glued them to a clear cup so you can see the pretty golden popcorn inside.

I covered the original label for the licorice and changed it to "old fashioned licorice" to add more to the vintage feel. Adding it on top of a cake stand made it extra special!


THE CAKE
I thought it would be fun to just do a simple but creative cupcake for the party. After learning how easy it is to create a popcorn look-a-like cupcake, I knew this was the perfect compliment to my table.
To save money on the cake, bake your own made from scratch cupcakes, and homemade buttercream frosting. Frost the cupcakes once they are cooled, and immediately add your faux popcorn topping.
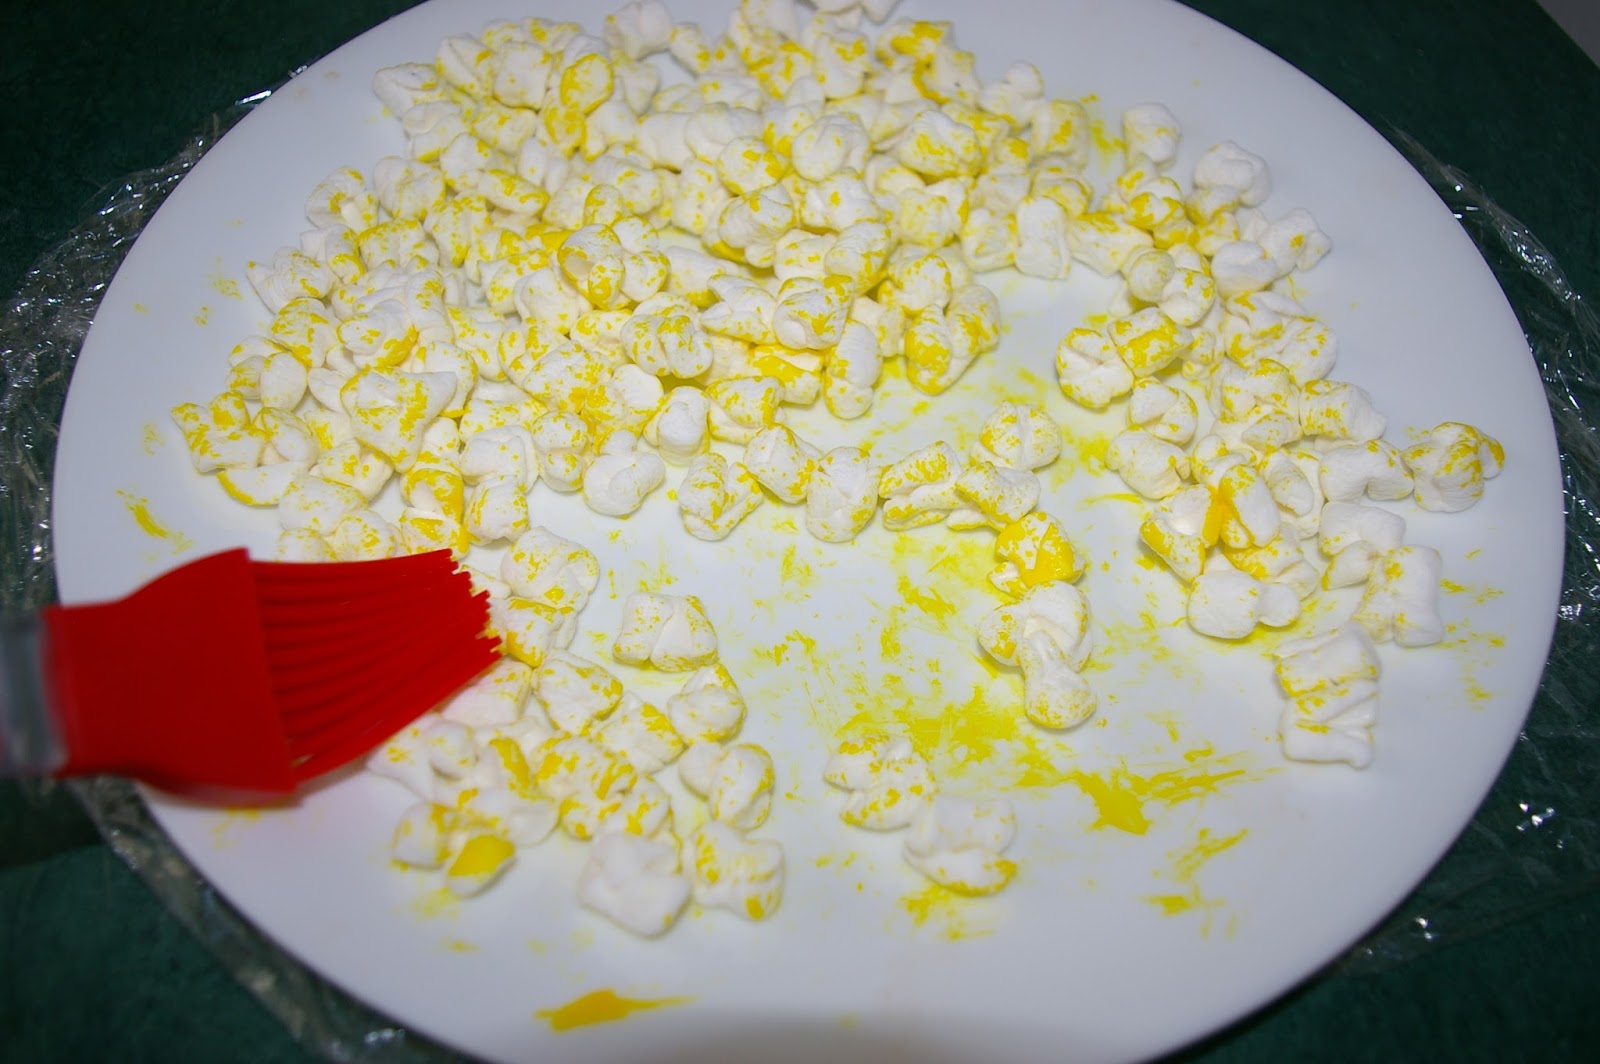
These are so dang easy you will laugh. All you have to do is take some mini marshmallows, cut them twice with kitchen sheers, and then brush a little bit of yellow food coloring (I used gel) on the tops. Let the gel dry for about 20-30 minutes before using so it doesn't get all over your fingers.


I bought these cute little cupcake covers at the same party store I purchased the balloons. They were only $2.39 for 12.
THE PARTY FAVORS
I made little baggies filled with "movie treats" for the kids using dollar store candies.
Then I filled other baggies full of stickers and crayons also purchased from the dollar store. Total cost for 100 crayons, candy for 10 kids, and 200 stickers... $11.00.
I found that putting them In individual packages for the boys and the girls helped the decorating process go very smoothly with no chaos! Just what a mommy needs :)


The kids got to watch Monsters University, eat popcorn, treats and decorate a car. Then we opened gifts and enjoyed cupcakes. Overall I think it was a hit, and I loved hearing the kids giggle and have a fun time together.
Benson even got to wear shorts... in November. :)


Happy 4th Birthday Benson, you are so loved!
xoxox

Subscribe to:
Posts (Atom)


share this post »