Saturday, March 22, 2014

Mini Cheesecakes with raspberry swirls


I have been craving cheesecake for 2 weeks now and I finally gave in today and picked up some cream cheese. Now, I don't know how you feel about your cheesecake but for me, I can only have a sliver before it gets too rich.
I decided today instead of making a whole big cheesecake that would probably go to waste, I would make some mini's and share with my Sister in law who is celebrating her birthday. Win Win.
 
I found this recipe from "Martha's Cupcakes" a while ago, and I love it. They look so beautiful and complicated, but if you follow a few simple steps, they turn out looking like they are from a restaurant! The first time I made it I was a little freaked out of doing a "water bath" so I skipped that step and unfortunately my cakes were sunken in the center. A tip for you: Don't skip the water bath. Its easier than it sounds and it makes for beautifully puffy little cakes that will make you smile.
 
The original recipe makes 32 cheesecakes, perfect for a bridal/baby shower or any party you want. For a family size, I will also share a broken down recipe that can make 12 cheesecakes or one for 8.
I have never frozen these cheesecakes as they have never lasted long enough, but I do know they will store in the fridge for a few days if stored properly in an air tight container.
Hope you enjoy this sweet little recipe!
 
 
Recipe: {Makes 32 Cheesecakes}
-Graham cracker crust-
1 1/2 cups finely ground graham crackers (use gluten free graham cracker crumbs if desired)
4-5 tablespoons butter, melted (It may feel a little too dry but once compacted it will set very well!)
3 tablespoons sugar
1/4-1/2 teaspoon cinnamon (OPTIONAL)

-Cheesecake filling-
4 bricks of cream cheese (32 oz) MUST BE ROOM TEMPERATURE
1 1/2 cups sugar
1/8 teaspoon salt
1 teaspoon vanilla
4 large eggs, room temperature (setting your eggs out helps them incorporate into the filling more smoothly)

-Raspberry topping-
In your blender, mix a cup or so of fresh or frozen (thawed) raspberries, strawberries or triple berries.
Add a tablespoon of sugar (more if you want it sweeter) and blend.
Pour liquid through a sieve to separate seeds to make a smooth fruit topping.


 Recipe" {Makes 12 cheesecakes}
-Graham cracker crust-
2-3 tablespoons butter, melted
1 cup graham cracker crumbs (use gluten free graham cracker crumbs is desired)
3 teaspoons sugar
1/4 teaspoon cinnamon (OPTIONAL)

-Cheesecake filling-
2 bricks of cream cheese (16 oz) MUST BE ROOM TEMPERATURE
 3/4 cup of sugar
pinch of salt
1/2 teaspoon vanilla
2 large eggs- room temperature


-Raspberry filling-
1/2 cup of raspberries or about 6-8 strawberries
2 teaspoon of sugar
In your blender, mix fresh or thawed raspberries, strawberries or triple berries and sugar until pureed.
Pour liquid through a sieve to separate seeds to make a smooth fruit topping.

 
{Recipe: makes 8 cheesecakes}
 -Graham Cracker Crust-
2 1/4 tsp. sugar
1/4 cup + 2 Tbsp. graham cracker crumbs (use gluten free graham cracker crumbs if desired)
2 1/4 tsp. butter, melted
Dash of cinnamon (OPTIONAL)

-Raspberry Topping-
1/2 cup. raspberries, strawberries or triple berries fresh or thawed.
1 tsp. sugar

-Cheesecake filling-
1 brick (8 oz.) cream cheese MUST BE ROOM TEMPERATURE
1/4 cup + 2 Tbsp. sugar
pinch of salt
1/4 tsp. vanilla
1 large egg room temperature
 
 Directions for all:
Preheat oven to 325°F.
Line your muffin tins with paper liners. To make your life very easy, cut small strips of wax or parchment paper to go underneath your cheesecakes to make them extra easy to remove! Spray liners with pam cooking spray.

 Stir together ground graham crackers, butter, sugar and optional cinnamon. Press 1 tablespoon crust mixture firmly into bottom of each lined cup. Press with a (tippy) cup to make a firm crust! Bake until set, about 5 minutes. Transfer tins to a wire rack to cool.

Blend raspberries, strawberries or triple berries and sugar in a food processor or blender until smooth, about 30 seconds. Pass puree through a fine sieve into a bowl, pressing with a spatula to remove as much liquid as possible and separate seeds. Toss seeds in the garbage when done.

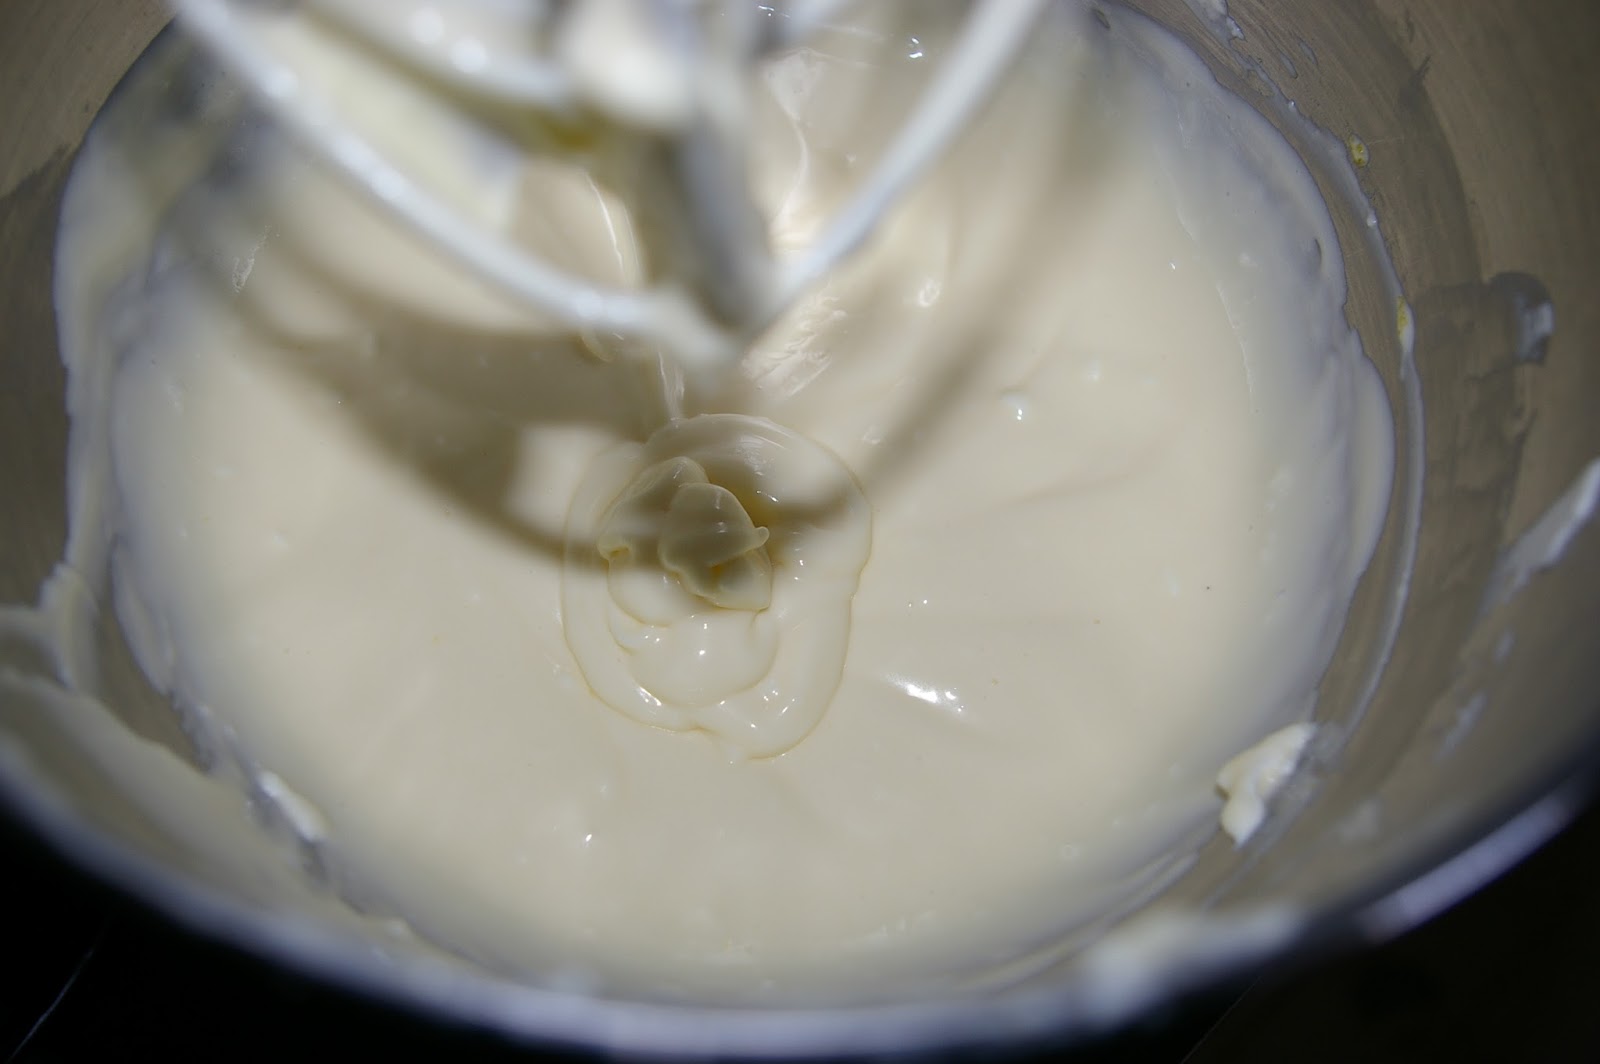
With an electric or stand mixer on medium-high speed, beat cream cheese until fluffy, scraping down sides of bowl as needed. With mixer on low speed, add your sugar in a steady stream. Add salt and vanilla; mix until well combined. Now add your eggs, one at a time, beating until just combined after each.

Spoon 2 heaping tablespoons of filling over crust in each cup. Use a spoon to make a few drops of  raspberry, strawberry or blackberry puree on the top of each cheesecake (about 1/2 a teaspoon). With a  skewer or back of your spoon, swirl sauce on the top of the cheesecakes . Put your cupcake pan on a baking sheet and add enough water to go about 1/2 way up the sides of the cookie sheet. THIS IS ALL YOU HAVE TO DO FOR THE WATER BATH! Do not skip this step, or your cheesecakes will sink in the center during baking.

Bake cheesecakes 30-32 minutes or until centers are set! THE WATER WILL BE VERY HOT so carefully remove your pan from the oven and out of the water on the tray. I like to turn the oven off and open the door a little to let them cool for about 5 minutes and I am able to carefully lift the pan out. Carefully transfer cheesecakes to a pan that you will transfer into the fridge.  Refrigerate for AT LEAST 4 hours. The longer the better.
 These can be made a day head, and I actually think they taste better that way as they are better set. They can be stored for 3 days (after cooled overnight, remove paper liners to store as they become moist as time goes on). Store in an airtight container or large ziplock bag in the fridge.
 
                                   I used my baby's tippy cup to press the crust into the tins.


 *Make sure and mix things in the right order, cream cheese, sugar, vanilla, salt and then eggs. It does make a difference! You should end up with a very smooth and creamy filling. Take a spatula and scrape down the sides and bottom of bowl to make sure you don't have any chunks of cream cheese.

 
Using a sieve to strain the seeds leaves a delicious smooth raspberry sauce.


Just a few drops on top will be perfect. Use a skewer or the back of a spoon about 1/4 of the way down into the filling to swirl them.
**NOTE: As you can see in my first pan, I used strawberry to top my cheesecakes and the liquid was much thinner than the raspberry below. It was also a lighter pink color after swirled (see 3rd pic) still very pretty but if you want the deep red color, go for the raspberry for sure).


**NOTE** did you know you can find cake carriers at the $1 store? They are so cute and PERFECT to carry/store/deliver cupcakes, cakes or cheesecakes! And since they are only a buck, you can give the container to whomever you're delivering the goodies too! No pan returning? That's my style.
 
 
The perfect bite of creamy sweetness.
 
 
This recipe can be made with so many toppings. You could try plain cheesecakes with blueberries on top, cherry, caramel or chocolate... the sky is the limit! You could also use a Nilla wafer for the crust or an oreo!
 
Don't forget to pin the recipe to your goodie folder!
 
  
post signature

Monday, March 17, 2014

Make your own CONFETTI Cupcakes

 
 I don't know about you but even in my adult age I think confetti cupcakes are super fun and cute and so exciting to get or give to someone for a birthday.
Today I stumbled upon Sally's Baking Addiction and found these darling little confetti cakes that she made from scratch... yep that's right! No store box cake needed!
It seems like a no brainer but you can actually add the sprinkles to your batter to make the confetti, and they melt in as they bake so you are not crunching your way through... This recipe is fluffy and moist and I liked it so much I wanted to share it with you.
 
Recipe Homemade Confetti Cupcakes:
Recipe source: Sally's baking addiction
 
1 and 2/3 cup all-purpose flour
1/2 teaspoon baking powder
1/4 teaspoon baking soda
1/2 teaspoon salt
1/2 cup (1 stick) unsalted butter, melted
1 cup granulated sugar
1 large egg
1/4 cup vanilla yogurt or sour cream
3/4 cup milk
2 teaspoons vanilla extract
1/2 cup sprinkles (I USED 1/4 and it was plenty!)

Preheat oven to 350 degrees F.
In a medium bowl, whisk together flour, baking powder, baking soda and salt.

In another bowl, melt butter and then stir in sugar. Let cool for a moment and add milk, egg, vanilla and sour cream or yogurt. Slowly combine dry ingredients until mixed. Batter will be thick.
Stir in sprinkles JUST UNTIL COMBINED. If you stir too much all of the dye will leak off into your batter.


Add to 12 cupcake liners and bake for about 18-20 minutes or until toothpick tested done. Makes 12 cupcakes.

Let cool and frost with my favorite buttercream frosting {I think almond pairs best with these cupcakes}


You will excuse me now so I can enjoy a cupcake before they are all gone :)

 
post signature

Friday, March 14, 2014

How to make a 5 minute no sew table runner, plus a fun new centerpiece from collections around the house

I love to change my centerpieces up for the seasons. I'm not big on wall décor or setting out a bunch of cluttery trinkets when a new Holiday comes, but I find that a change in centerpiece every now and then is so fresh and fun.
 
I had some extra fabric that I had ordered to make a few pillows for my bed, and I thought a small strip of it on the table would be so darling. I love the polka dots and the neutral colors. This fabric is upholstery fabric so it has a fun texture and lays nicely.


  I cut a strip about 2 feet by 40 inches. If I had a square or rectangular table, I would probably make the runner longer to go off both ends, but for my round table it fits perfectly centered. I knew I didn't have time (or patience) to get the old sewing machine out today, so I pulled a few strings (literally) and it was done in 5 minutes!
All I did was fray each end and pull about 5-7 strings (as many as you want to make the fray long or short). I imagine as time goes on it will loose a few more here and there, but that just makes it better! If it snags a little half way through, that's ok, just trim it as you go and keep pulling.
This fabric can be found HERE.


As for the centerpiece, I gathered up a few things from around the house. A few pretty plates and a tiny china cream pitcher, a terra cotta planter with a fake thyme herb plant. A vintage book, because exposed book backs and pages make my heart skip a beat, and a pretty doily from Grandma. All on top of a sweet shabby tray found from Vintage Farm Furniture. All other items, thrifted.


post signature

Wednesday, March 12, 2014

Outrageous Double Chocolate-White Chocolate Chunk Cookies

 
I tried a new cookie recipe today from one of my favorite cook books, Betty Crocker Bridal Edition. The name alone sounded too good to pass up, so we had to give them a go.
 
These little chocolatey delights are a fun change up from the traditional chocolate chip cookie, and the smell in your kitchen as they bake will have you peaking through the oven window begging for them to be ready! I hardly had enough patience to let them cool before diving in to one (hundred)... and I will be sure to share these with my family members or neighbors so I don't end up scarfing them all up myself! This would be a great recipe to make for a party or family event as it makes A HUGE plate!
 
Have a happy Wednesday
 
 
Recipe:
1 bag (24oz) semi sweet chocolate chips
1 cup butter, softened
1 cup packed brown sugar
1 teaspoon vanilla
2 large eggs
2 1/2 cups all purpose flour
1 1/2 teaspoons baking soda
1/2 teaspoon salt
1 package (6 oz) white baking bars cut into bite sized chunks
1 cup chopped pecans or walnuts
 
Heat your oven to 350 degrees F.
Heat 1 1/2 cups of the chocolate chips on med-low heat stirring consistently, until melted. Cool a few minutes (not long enough to let harden)
Beat butter, sugar and vanilla in a large bowl until fluffy. Beat in eggs and melted chocolate until fluffy. Now add dry ingredients (flour, soda and salt).
Stir in the remaining 2 1/2 cups of chocolate chips and the white chocolate as well as your walnuts or pecans.
 
Drop by cookie scoop onto an ungreased cookie sheet about 2 inches apart.
Bake 12-14 minutes or until set (CENTERS WILL APPEAR SOFT)
Cool 1-2 minutes before removing to a cooling rack.
 
**Note, since these cookies are a dark brown chocolate color, you wont be able to tell if you have over cooked them. Be sure to mark your timer so that they cook just until the outer edges are set and the middle is still soft. This will make for a delicious chewy cookie!
 
 
post signature

Tuesday, March 4, 2014

My secrets to basic bread making

 
If all I am known as for the rest of my life is "the girl who made really tasty bread", well then I will die a happy human. I love making bread and I can honestly tell you it makes such a huge difference in my mood and happiness the days I have time to make it at home.
I grew up with a grandmother and a mother who loved making bread. I remember working on the farm for my Dad during potato harvest, and we could always, ALWAYS count on grandma bringing a big pan of hot caramely cinnamon rolls as a treat for the help. Now that Grandma is a little older and unable to do this as much, she has shared with me that she felt this was her way of participating in the harvest. She knew this was a special way that she could contribute.
My mother learned these skills as well, and we were lucky to grow up with a warm slice of homemade white and wheat bread slathered with butter and honey.
Not all people have interest in learning to make bread. Some think they don't have the time. Some are frightened at the word "knead" and worry that they will mess it up somehow so they don't even bother trying. I will tell you that learning to make bread is something that can bring a lot of confidence and joy, and once you get over the idea that it is impossible for you, you might just fall in love with it as I have.
Serving up a beautifully browned loaf of fluffy heaven on your kitchen table will have the kiddos (and spouse) gathering close and even if its just for a moment, you have family time.
My son is 4 and in the last few years, he has loved being my little helper in the kitchen. It brings a closeness to our relationship that I cant find during other activities as I am swept up in the stress that motherhood can bring.
 
Today I want to share with you some of my best kept secrets on basic bread making and help you see how easy and fun it really can be.
Secret #1.
Have the right attitude. Oh sure I've thrown a ball of dough or two in the trash... any great baker has. The point is, you are learning in the process. Start with a good (not terrified) attitude and show some love to what you're doing. It WILL make a difference.
 
Secret #2.
What kind of yeast are you using? I have tried red star and many others. My Grandma and Mother both swear by SAF-yeast and after using it I will never go back to anything else. The main difference that I can tell you is, the taste of the bread has ZERO "yeasty flavor" with the SAF. Some of the others I have tried simply give the bread a stronger tangy yeast flavor that can be unappetizing. Make the change and don't look back. You will NEVER regret it.
Secret #3.
Did you know that proofing your yeast with a sugar water mixture will make a huge difference? All bread recipes call for some kind of sweetener (sugar or honey usually). Mixing the warm water with the sugar and the yeast will actually "feed" the yeast and help it start to foam up.... insuring an airy fluffy bread that will rise for you.... that my friend, is the ticket to good bread. Salt will kill the yeast, so you want to make sure and add the salt in with the flour AFTER the yeast has already proofed (become foamy and bubbly)
 
Secret #4.
Have you ever tried replacing bread flour for all purpose? I started using bread flour this year and it has made a big difference in my bread! Bread flour has a higher gluten content. Gluten is what gives dough its elasticity and chewiness once baked. You can use all bread flour in your bread recipes. I have found the only time I had trouble with it was when I was forming the bread into pretty shapes. All purpose flour helps bread hold its form better, so if you are making crazy bread or something that is needs to keep its tight shape, you can use half all purpose and half bread flour or just all purpose for that.
  
Secret #5.
If you are scared to death of ruining your bread by kneading it, know this. Unlike cake recipes that tell you to "mix just until moistened" bread can be punched, rolled, tossed, heck even thrown up in the air a few times, and it only makes it better. Kneading the dough helps develop the glutens in the flour so the more you knead it, the chewier the bread. If you hate getting your hands dirty, than lucky for you there is another solution. Stand mixers come equipped with "dough hooks" that you can hook on while you're in the middle of adding your flour. This hook will stretch the dough and do the job for you. Then all you have to do is cover the bowl and let your dough rise..... hands free bread making? While our grandmothers may be disgusted, we live in a busy world where this handy tool comes in as a life saver.
 
 
(These are examples of the dough in stages of mixing, switching to dough hook kneading, and rising)

Bonus: Not all bread recipes are the same. If you are hung up on "I don't have the time"... well that's just a bad excuse. Sure there are recipes that take 2-3 hours sometimes longer to make... but I have found so many that can be done in an hour or less. Here are two great examples... Easy hot and chewy buttered pretzels and Triple loaf french bread in a flash. If you are home on your day off, take the 10-15 minutes it makes to mix the dough, and then go and spend time doing what you need to while it is rising. Typically this is the most time consuming part of making bread and the yeast is doing all the work for you!
 
These are my 5 secrets to the basics of bread and I sure hope it has inspired you to give home made bread a try. Be sure to check out the BREAD SECTION of my recipe index where you will find some of my favorites!
 
I am thankful for my knowledge of baking and the happiness it brings me. For some reason when I am making bread, my cares and stresses seem to disappear and I am left with happy memories from growing up of helping mom and grandma in their kitchen. Along with that I am building memories with my own family, and sharing a little homemade goodness with friends and neighbors to show our love. Happy baking and good luck!
 
Like what you learned? Save it to your PIN box


post signature
 
Blogging tips